Did you know that over 80% of professional photographers admit to carrying unnecessary equipment on their trips? This often leads to frustration and missed opportunities. Striking the right balance between minimalism and professional-grade results is crucial for capturing stunning images without the burden of excess.
From the rugged terrains of the Himalayas to the vibrant streets of Portugal, selecting the right tools can make or break your experience. For instance, during a challenging expedition in Ladakh, altitude and limited equipment tested creativity and adaptability. These real-world examples highlight the importance of strategic choices.
This article explores how to optimize your setup, stay organized, and adapt to various environments. Whether you’re a seasoned pro or a passionate enthusiast, these insights will help you achieve remarkable results with less hassle.
Key Takeaways
- Balance minimal gear with professional-quality outcomes.
- Strategic equipment selection enhances adaptability.
- Real-world examples demonstrate the value of optimization.
- Organization is key to efficient workflows.
- Practical adaptations ensure success in diverse environments.
Why Packing Light is Essential for Travel Photography
Managing space and weight can make or break your experience as a photographer. Airline restrictions, such as the 7-8kg carry-on limit, often force tough decisions. For instance, at Seychelles International Airport, many travelers face delays due to overweight luggage. This highlights the importance of strategic equipment choices.
Switching to mirrorless systems can reduce your load by up to 45%. For example, the Sony a7III weighs just 2.89lbs, compared to bulkier DSLR setups. This not only saves weight but also enhances mobility, especially on multi-activity trips.

Different styles of trips demand varying levels of equipment. City tours may require less gear than Himalayan treks. A case study in Lisbon showed that a single 24-70mm lens was sufficient for capturing intricate tile designs. This demonstrates how adaptability can lead to stunning results.
Parental responsibilities also play a role in equipment decisions. Balancing kids’ toys with camera gear often means prioritizing essentials. This approach ensures you’re prepared without overloading your bag.
| Camera Type | Weight (lbs) | Mobility |
|---|---|---|
| DSLR | 5.5 | Low |
| Mirrorless | 2.89 | High |
By focusing on essential gear, you save time and energy. This allows you to focus on capturing the perfect shot, no matter where your trip takes you.
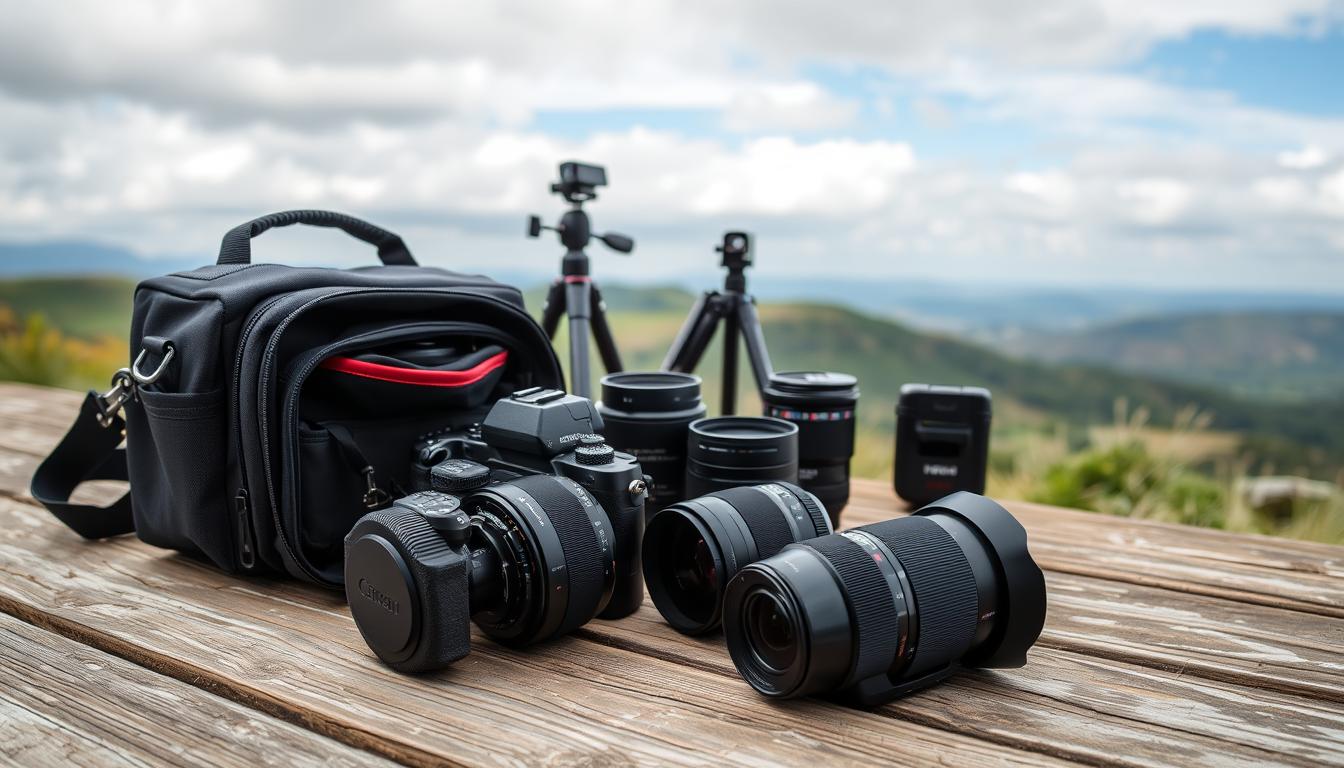
Choosing the Right Gear for Your Trip
Selecting the right equipment can transform your experience. Whether you’re exploring bustling cities or remote wilderness, the tools you carry play a pivotal role in your success. A well-curated setup ensures you’re prepared for any scenario without unnecessary weight.

Essential Camera Bodies and Lenses
Your camera and lenses are the foundation of your setup. Professionals often recommend the 24-70mm and 70-200mm lenses, as they cover 90% of scenarios. For urban environments, a 16-35mm lens is ideal for wide-angle shots. In contrast, a 70-200mm lens excels in capturing distant details in wilderness settings.
When choosing a camera, consider the trade-offs between full-frame and crop sensor options. The Sony a7III, a full-frame model, offers superior image quality but comes at a higher price. For budget-conscious photographers, the Sony a6000 provides excellent performance in a compact design.
Accessories You Can’t Leave Behind
Beyond the camera and lenses, certain accessories are indispensable. A sturdy tripod ensures stability in low-light conditions. Cleaning kits, like the Rocket Blaster and ZEISS wipes, keep your equipment in top shape. For data security, the LaCie Rugged Mini offers reliable backup storage.
Weather protection is another critical consideration. A rain cover can save your gear during unexpected downpours. Additionally, documenting your equipment’s serial numbers in Dropbox before your trip adds an extra layer of safety.
| Accessory | Price | Purpose |
|---|---|---|
| Rocket Blaster | $19 | Cleaning |
| ZEISS Wipes | $12/pack | Cleaning |
| LaCie Rugged Mini | $189 | Backup Storage |
“The right gear doesn’t just enhance your photos—it enhances your entire experience.”
By carefully selecting your camera, lenses, and accessories, you can focus on what truly matters: capturing unforgettable moments. Whether you’re scaling mountains or strolling through city streets, the right tools make all the difference.
Organizing Your Photography Gear Efficiently
Efficient organization can transform how you handle your equipment. A well-structured setup ensures you’re always ready to capture the moment without fumbling through your bag. Start by using ICU units, like the f-stop Shallow Small ICU, which reduce damage risk by 40%. These units fit seamlessly into hiking backpacks from brands like REI and Manfrotto.

Quick-access organization is key for frequently used items. Store lens wipes in side pockets for easy reach. This small adjustment can save time and keep your equipment in top condition. Packing cubes are another game-changer, increasing accessible gear by 30%.
Security measures are equally important. Use combination locks or cable lock alternatives to protect your pieces. In cities like Rome and Zurich, hotel safe storage protocols add an extra layer of safety. Always document your gear’s serial numbers in a secure cloud service.
- Layer system: ICU units inside hiking backpacks.
- Quick-access organization for frequent-use items.
- Security measures: Combination locks vs cable lock alternatives.
- Weight distribution techniques using Think Tank dividers.
- Dual-purpose packing: Camera bags carrying kid’s snacks/toys.
By organizing your bag in this way, you ensure everything has its place. This not only saves time but also reduces stress, allowing you to focus on what matters most—capturing stunning images.
Packing Strategies for Travel Photographers
Mastering the art of efficient storage can significantly enhance your workflow. Choosing the right bags and cases ensures your equipment stays safe and accessible. Whether you’re navigating airport security or trekking through rugged terrain, a well-thought-out system makes all the difference.

Using Camera Backpacks and Cases
Investing in high-quality bags like the Eagle Creek Packable Daypack can reduce perceived weight by 35%. For added protection, the Pelican 1510 case is ideal for safeguarding expensive equipment. These options balance durability and portability, making them perfect for any adventure.
Consider the Peak Design 20L for airline-approved carry-on configurations. Its compact design meets most size restrictions while offering ample space. For longer trips, the NYA-Evo Fjord 60c provides versatility and organization, ensuring everything has its place.
Distributing Weight for Airline Compliance
Managing weight is crucial for airline compliance. Separating your laptop into a secondary bag can help redistribute the load. This simple hack ensures your primary backpack stays within limits without sacrificing essentials.
Another clever trick is using jacket pockets for extra battery storage. This garment loophole maximizes space while keeping critical items within reach. By combining these strategies, you can stay organized and compliant, no matter where your journey takes you.
Traveling with Photography Gear: Practical Tips
Ensuring your equipment stays safe and functional while on the move requires careful planning. From navigating airport security to adapting to diverse environments, these practical tips will help you protect your investment and focus on capturing stunning images.

Navigating Airport Security with Camera Gear
Airport security can be a challenge, especially with lithium battery restrictions affecting all travelers. To streamline the process, pack your equipment in a TSA-compliant order. Keep batteries in carry-on luggage and ensure they’re easily accessible for inspection.
In 2022, the baggage crisis at Frankfurt Airport highlighted the importance of proper preparation. Use a checklist to ensure all items are accounted for and securely packed. This approach minimizes delays and reduces stress during your journey.
Protecting Your Gear in Different Environments
Different environments demand unique protection strategies. In humid areas, silica gel packs prevent moisture damage. For rainy climates, waterproof bags are essential to keep your equipment dry and functional.
Altitude can also impact your gear. At 17,000 feet, battery life decreases by 40%. Carry extra batteries and keep them warm to maintain performance. These small adjustments ensure your equipment remains reliable, even in extreme conditions.
- Step-by-step security prep: TSA-compliant packing order.
- Environmental protection: Silica gel packs vs waterproof bags.
- Cultural considerations: Discreet handling in crowded areas.
- Insurance necessities: World Nomads vs Allianz coverage comparisons.
- Altitude adaptation techniques from Himalayan experiences.
By following these tips, you can safeguard your equipment and focus on what truly matters—capturing unforgettable moments. Whether you’re away for weeks or just a few days, these strategies ensure your gear stays in top condition, no matter where your journey takes you.
Maximizing Your Photography Opportunities While Traveling
Capturing the essence of a destination requires more than just a camera. It’s about immersing yourself in the culture, understanding the people, and finding the perfect time to shoot. Whether you’re exploring bustling cities or serene landscapes, these strategies will help you make the most of every photo opportunity.
Connecting with local photographer networks can increase unique shots by 65%. For example, collaborating with a Lisbon tile specialist can provide insider access to hidden gems. This approach not only enhances your portfolio but also deepens your cultural understanding.
When it comes to equipment, the 24-70mm lens captures 80% of street photography needs. Its versatility makes it ideal for both wide-angle and close-up shots. For night photography, essentials like the MeFOTO tripod ($299) and intervalometers ensure sharp, well-timed images.
Astrophotography requires preparation. Practicing at least three sessions before your trip helps you master the techniques needed for stunning night skies. This idea ensures you’re ready to capture celestial wonders.
| Item | Price | Purpose |
|---|---|---|
| MeFOTO Tripod | $299 | Stability for night shots |
| Intervalometer | $50 | Timed exposures |
| Rain Sleeves | $15 | Weather protection |
Ethical shooting practices are equally important. Respecting monastery etiquette or local customs ensures your work is both authentic and respectful. This approach not only enhances your photos but also fosters positive relationships with the community.
Adapting to weather conditions is crucial. Shooting during monsoons? Rain sleeves protect your equipment while allowing you to capture dramatic scenes. These small adjustments ensure you’re prepared for any room of challenges.
By combining these techniques, you can elevate your photography and create unforgettable memories. Whether you’re a seasoned pro or a passionate enthusiast, these tips will help you make the most of every moment.
Conclusion
Finding the right balance between minimalism and creativity can elevate your experience. Remember, not every moment needs documenting. Sometimes, less is more. For instance, during a trip to Portugal, experimenting with just a camera and a single lens led to some of the most authentic shots.
Before your next adventure, double-check your essentials. Ensure you have insurance documents, backup contacts, and cleaning kits ready. These small steps can save you from unnecessary stress.
We’d love to hear your tips and tricks! Share your favorite gear hacks or travel stories in the comments below. Let’s inspire each other to capture the world in new ways.
Finally, think about that Milky Way shot. With the right mindset and tools, even the most challenging scenes can transform into unforgettable memories. Happy exploring!
FAQ
Why is it important to pack light for travel photography?
Packing light ensures you stay mobile and comfortable during your trip. It also helps avoid extra baggage fees and makes navigating airports easier.
What are the essential camera bodies and lenses to bring?
A versatile mirrorless or DSLR camera and a couple of prime or zoom lenses, like a 24-70mm and a 50mm, are great for most situations.
What accessories should I never forget?
Don’t leave without extra batteries, memory cards, a lightweight tripod, and a lens cleaning kit. These are lifesavers on the go.
How can I organize my equipment efficiently?
Use padded dividers in a camera backpack or case to keep everything secure and accessible. Labeling compartments can also save time.
What’s the best way to distribute weight in my bag?
Place heavier items like camera bodies closer to your back and lighter accessories toward the front. This balances the load and reduces strain.
How do I handle airport security with my gear?
Keep your camera and lenses in a separate bag for easy inspection. Be prepared to remove them for screening if required.
How can I protect my equipment in different environments?
Use weatherproof bags for rainy conditions and padded cases for rough terrain. Silica gel packs can also help prevent moisture damage.
How do I maximize photo opportunities while traveling?
Research locations beforehand, arrive early for the best light, and always keep your camera ready for unexpected moments.